This is the second skill in my free series: a one-command color grade. Give it a video or a photo, pick a look, and it hands back a graded version — teal-and-orange, warm film, bleach bypass, black & white, and more. The audio comes through untouched, and there are no LUT files or editing apps involved.
Why color grading is the difference
Straight-out-of-camera footage almost always looks flat. That’s on purpose — cameras capture a neutral image so there’s room to shape it later. Color grading is that shaping step: pushing the shadows one way, the highlights another, adding contrast and richness until the shot has a mood. It’s a huge part of why a movie looks like a movie and a phone clip looks like a phone clip.
Grading by hand is a real skill and I still do it that way for client work. But a lot of the time you just want a good look applied quickly — a B-roll clip for a post, a photo for a thumbnail. That’s what this skill is for. Same neutral shot, one command, an instant cinematic starting point:
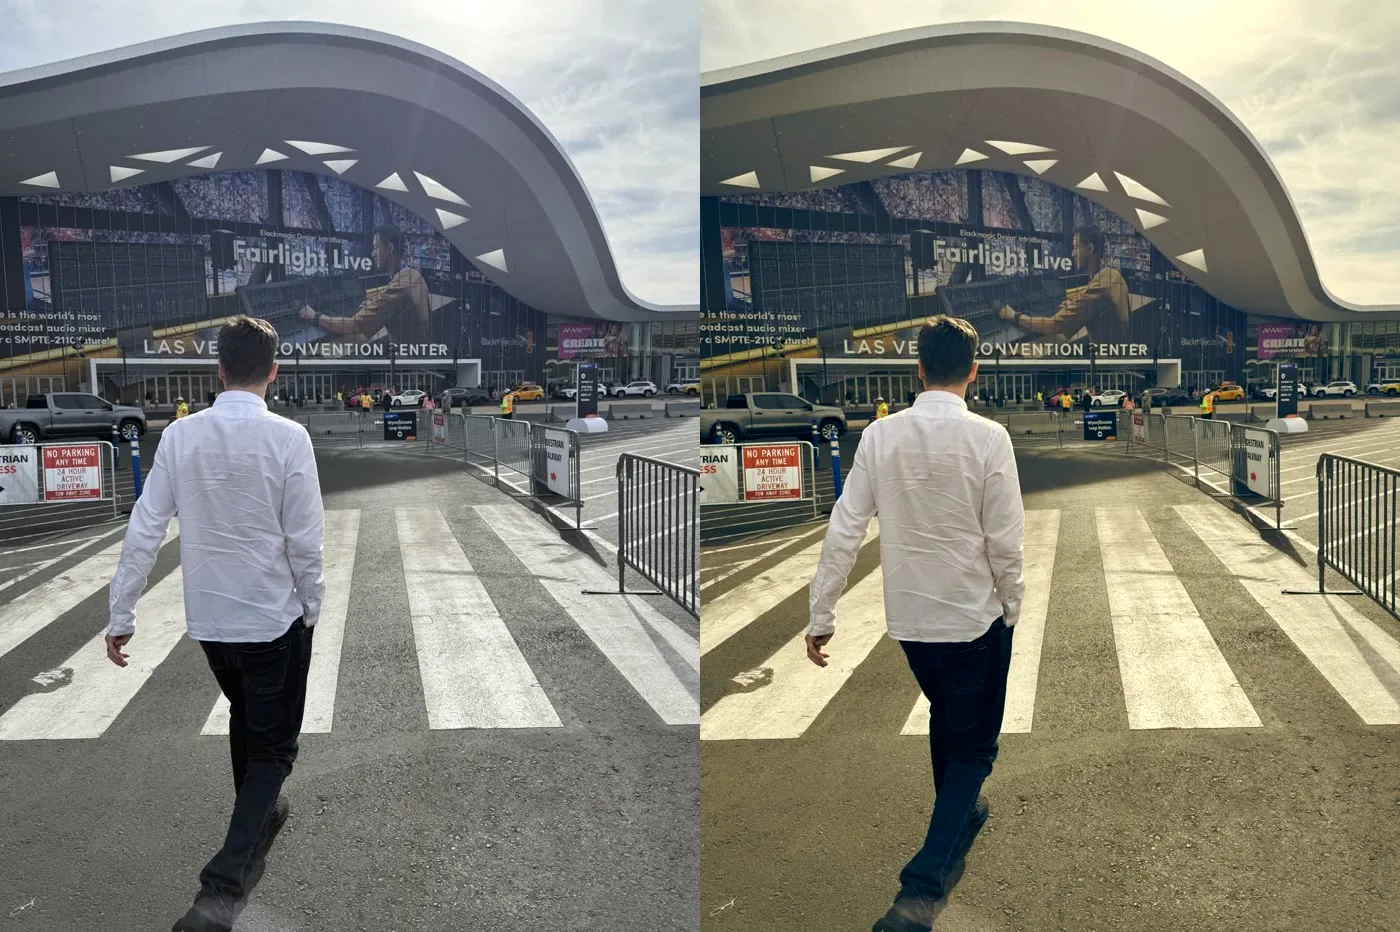
Left: the flat original. Right: the same shot with the teal-and-orange grade applied.
Six looks, one flag
The skill ships with six grades, each tuned to be flattering rather than heavy-handed. You switch between them with a single option:
- teal-orange — the modern blockbuster look: cool shadows, warm skin.
- kodak — warm, gentle film emulation that’s kind to faces.
- bleach — a desaturated, gritty, high-contrast bleach-bypass.
- noir — high-contrast black & white.
- vintage — faded, warm, lifted blacks, an old-photo mood.
- cyberpunk — neon: cyan shadows, magenta highlights, punchy.
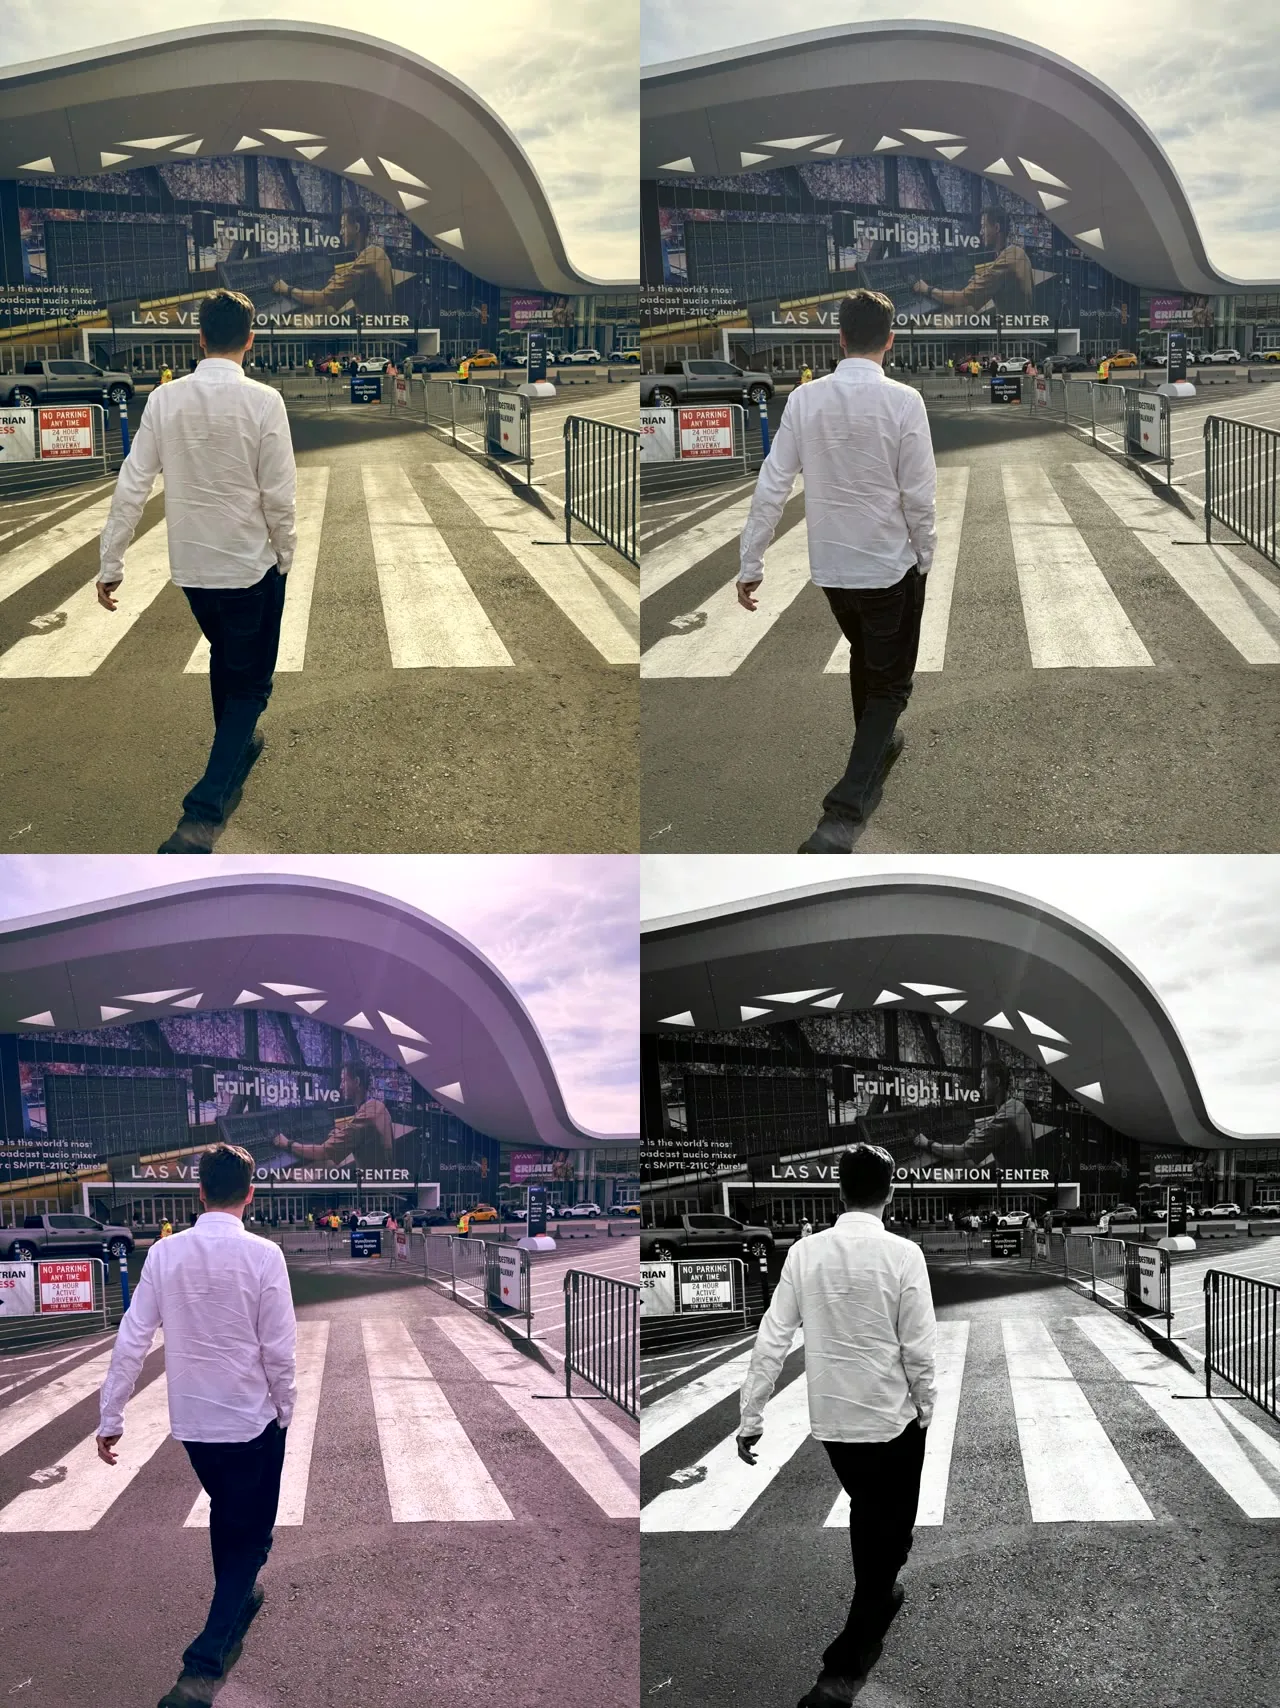
Four of the built-in looks on one shot — clockwise from top left: teal-orange, kodak, noir, cyberpunk.
How to use it
Point it at a clip, pick a look:
python3 film_look.py --in clip.mp4 --out graded.mp4 --look teal-orange
It works on photos too, and you can dial in film grain:
python3 film_look.py --in photo.jpg --look kodak --grain 0.2
Have a whole folder of B-roll? Grade all of it at once:
python3 film_look.py --in ./footage --look noir
When the input is a video, the audio is copied straight through — no re-encoding, no drift. The only requirement is ffmpeg. The grades are deliberately subtle; if you want a stronger effect you can add grain, turn on the vignette, or run the output through a second look.
Getting the skill — and why it’s free
Like the rest of this series, the whole thing is one small script plus a short instruction file that tells Claude how and when to use it. No install beyond ffmpeg, nothing to sign up for.
I’m sharing these free because they’re small, useful, and easy to pass along — and because the best way to learn what Claude skills can do is to run one and watch it work. If you’d like this grade skill, get in touch or follow the series on LinkedIn.